Main Print Heading
Print Subheading
Hints and Tips
Volvo MD22l-B timing belt change
Sooner or later we all have to replace (or have it replaced) our engine timing belt. Volvo describes it as a to do job every 3 year. General consensus is every 6 year, unless the hourmeter tells you otherwise.
But since most hourmeters from our beloved VP engine break down fairly fast, I would suggest to keep it at 6 years.
But even that is sometimes forgotten. I for one have been postponing it and putting on the MDSL list,...must do sooner or later.
Until recently I got hold of a tension belt gauge, a new one by the way, on ebay US and was proud to receive it for the total amount of 50 Euro. Thank you low US $.
It must of been a sixth sense, because after checking the belt I notice a serious decline in tension. In such a way I had to do something about it.
Tightening the timing belt involves nearly as much work as actually replacing it , so I decided to turn the necessity into a virtuous and replacing the whole lot, meaning belt, tensioner and idler.
But replacing parts also means buying new ones. And as we all know, marine engine parts are like airplane parts, outrageous expensive.
But this seemed to be my lucky day. Next to being applied in yachts and boats, the MD 22L-B was also used in cars, where known as the Perkins Prima 50 and where installed in Austin/Rover more specifically the Montego and the Maestro. (Also some LDV and Sherpa Vans)
Now that's a whole different ballgame don't you agree? That means I (we) can let go of the golden label "marineparts", and get our stuff in the normal world.
Research lead me to ebay.de where I could buy the parts that I needed, more to come later on. First things first.
Buying a workshop manual. Since the Montego and the Maestro are outdated, you can find these manuals nearly for free in the UK.
The book supplies you with all the required data, a must have so to speak.
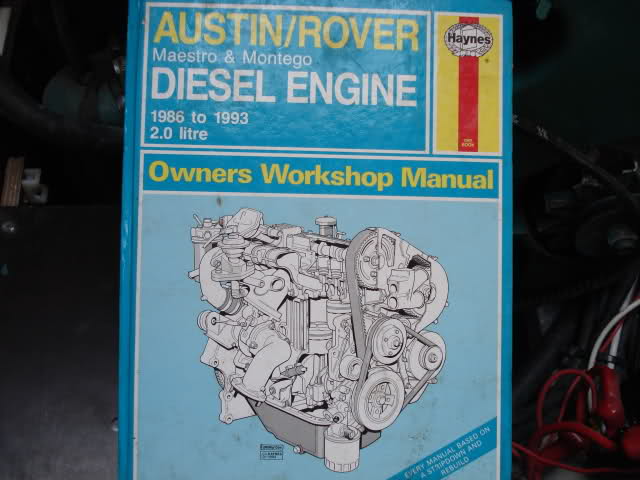
This is the manual, Haynes is a worldplayer for that.
And after some reading and preparing I started the job with a self confident feeling and ready as I would ever be.
Start by removing the hood of the timing belt, but in order to do that you have to take away the waterpump pulley and to begin with the drive belt of course.

Clear view of the field and I turned the 4 bolts back on not to loose them.
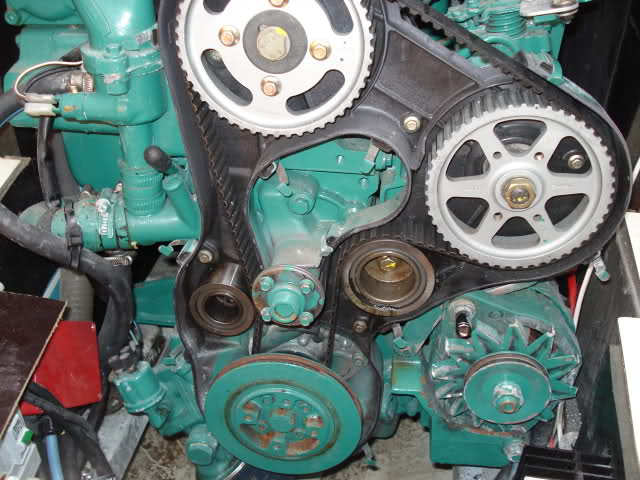
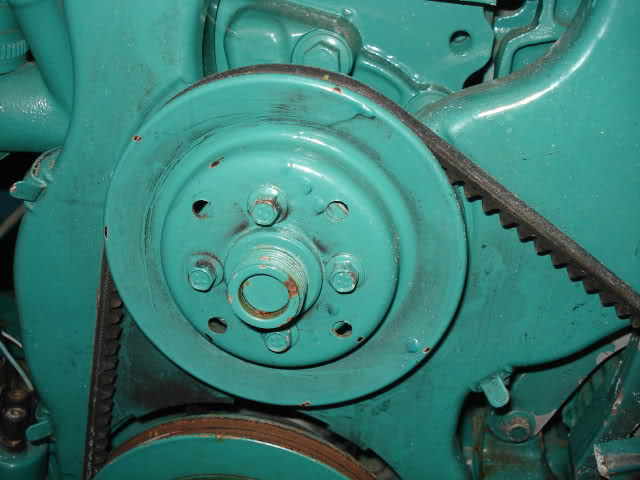
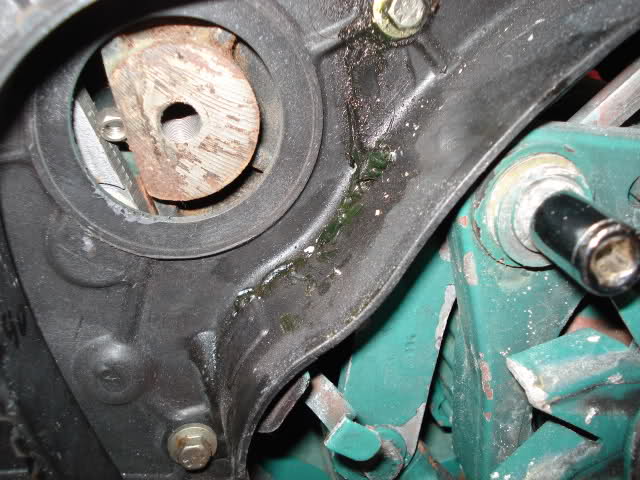
The hood is off, and we get a nice picture of that vital but ever so fragile part, the timing belt.
Notice the grease squirting out of the idler, that is the component above and left of the alternator.
By the looks of it my mechanical surgery didn't come too soon. Also the backplate and the cover where splashed with grease. This idler was begging to be replaced.
Maybe VP should make these hood/covers transparent?
Goes to show, you never see what happens behind a door until you open it.
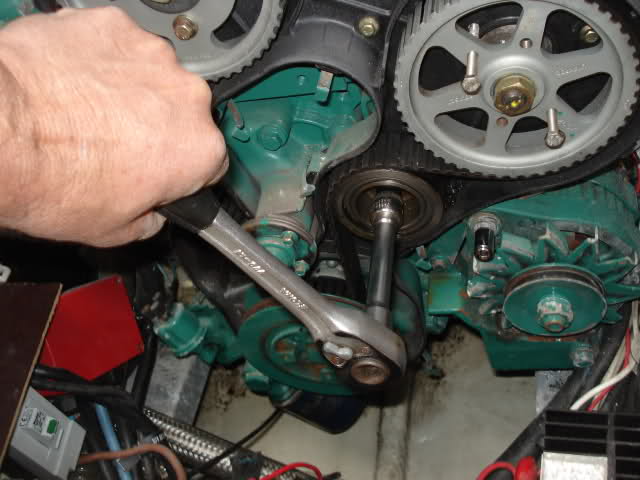
Now before starting the serious work some important thing will have to be done disabling the crankshaft, camshaft and injection pump so they wont decide to go their separate way after releasing the tensioner and the timing belt.
The locking of cam and crank is done by inserting dowel pins into the holes made in cam and crank. You will need to locate these holes, both crank and cam need to be aligned and that means turning the engine manually (that can take some time) until both cam and crank are set.
You can buy the dowel pins at VP if you're prepared to pay their price in gold. Again, much money for little things. But you can also use proper size drills, as I did, and that will also do the job.
The dowel pin diameter is 6.75 mm, a 6.5 mm drill is ok, not to mention 6.75 mm is better.
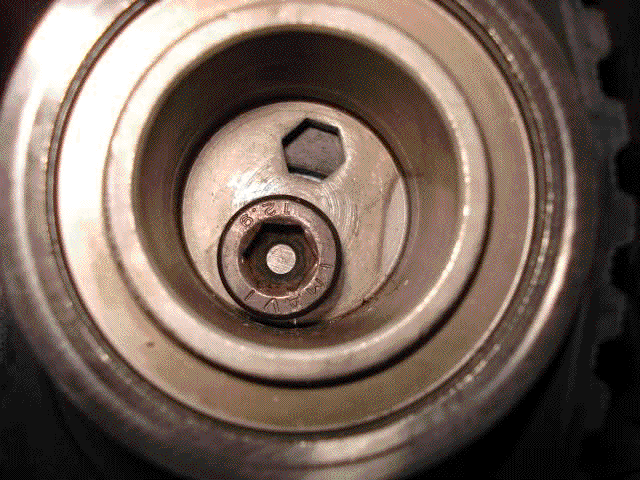
This is where the cam is locked, remove the little bolt and peep through the hole in the camcover, turn the crank until you see the hole in the camshaft appear.
Suggestion, use a smaller sized drill and put it in the camcover hole, when you see it falling in deeper while turning the crank by hand your there, finetuning to get the propersized drill in is necessary.
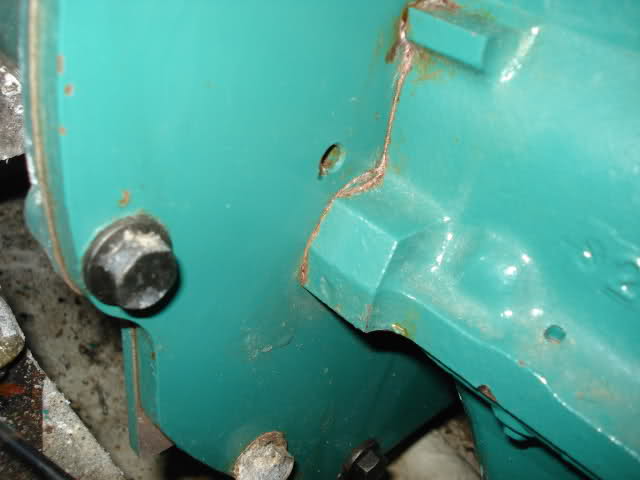
This is the location for the crank/flywheel locking. It's on the back- lefthand side of the engine when you're facing the timebelt.
Trial and error will lead you to an agreement between cam and crank.
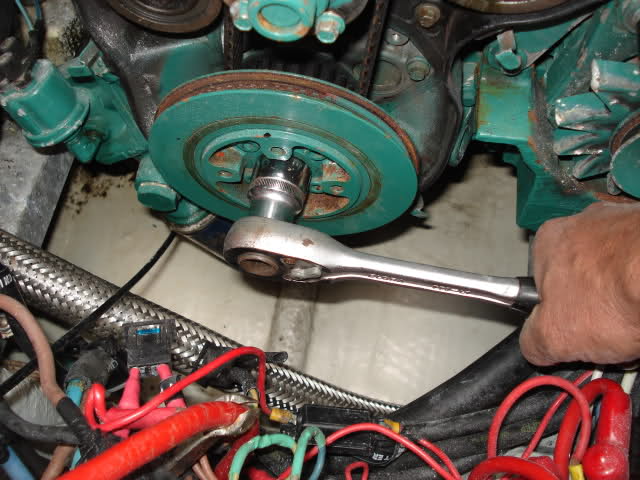
The way to turn the crank.
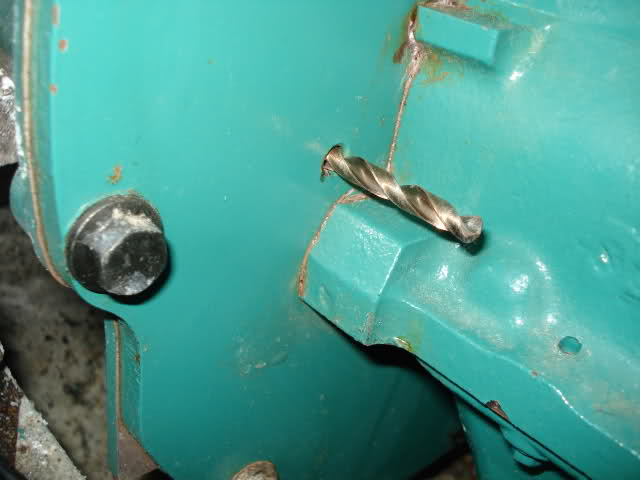
OK, number one is locked.
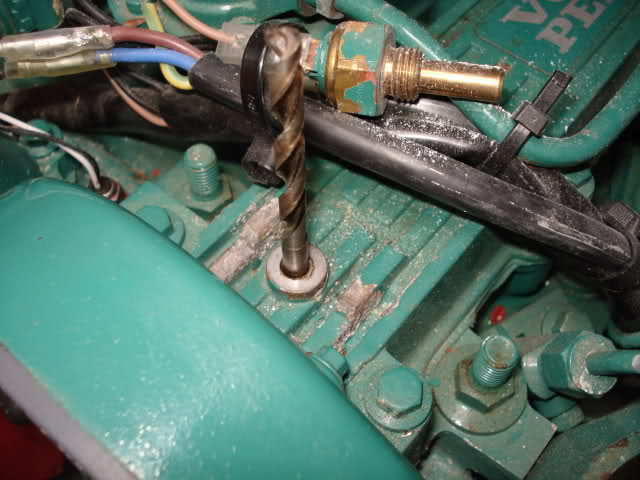
Number two follows suit.
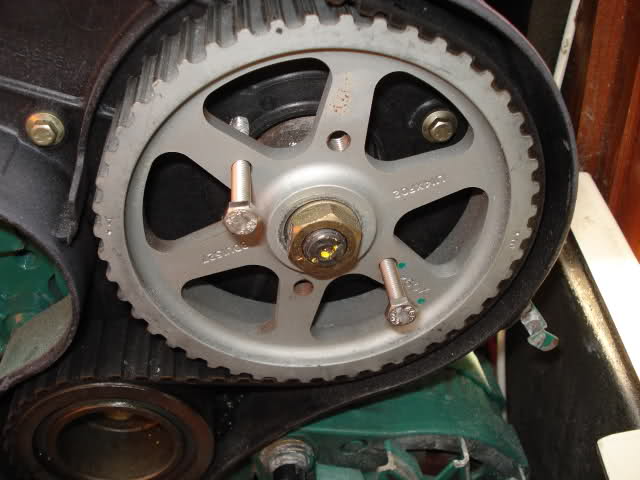
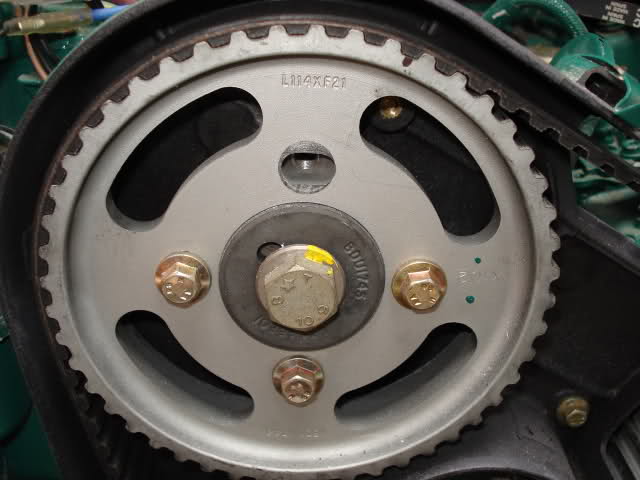
The injection pump needs a different approach. Here we use two bolt that go through the hole in the gear wheel and screwed in the backplate.
Notice the reversed letter A on the gearwheel lefthand side that will match a small mark made in timing belt backplate.
Better safe than sorry, I supplementary marked all pulleys and gear wheels so nothing can go wrong. Remember, the position of all the wheels towards eachother is very important, slipping even on tooth will make your engine do funny things.
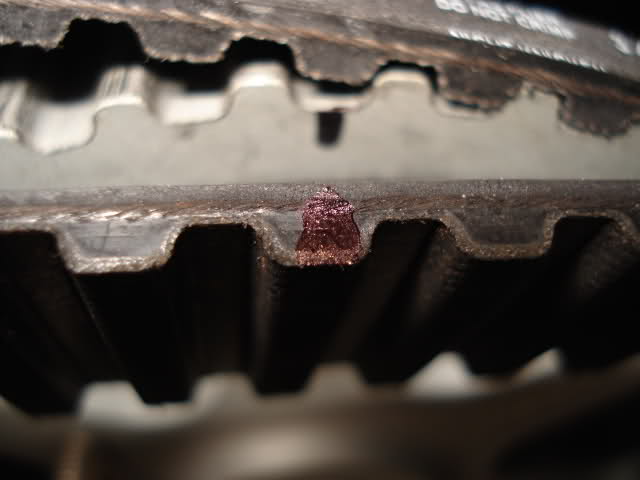
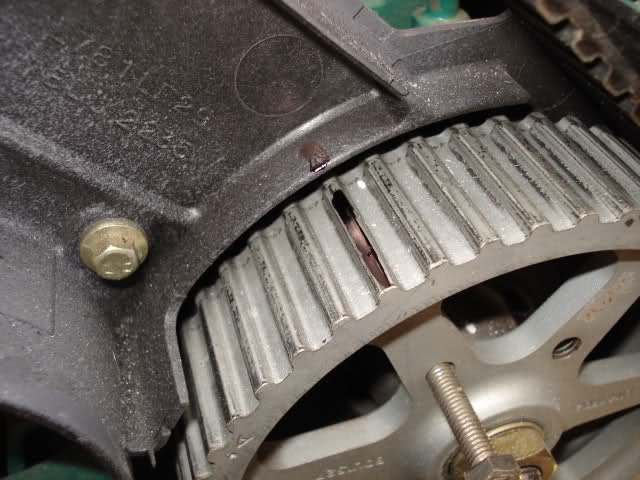
I even put marks on the old belt so I could easily count the number of teeth and compare it with the new installed belt afterwards.

Time to release the tensioner.
Also the idler can move to the junkyard.

The old belt has earned his pension, since he - in my case - has been doing overtime. His replacement was kind of overdue you see.
Notice the numbers written on the back of the belt. Before ordering the parts I've counted the total number of teeth ( the info on the belt was worn off) so no mistakes would be made. You see, it was not the case of just ordering marine parts, they where referred as carparts, and since there where different models on the Montego and Maestro it was all a bit confusing.
Measuring tensioner, idler and belt and comparing it with the info given by the seller would be a double check.
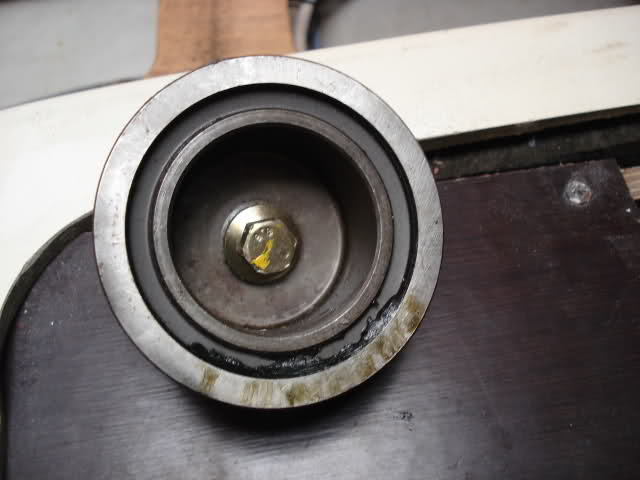
Worn and greasy idler close up
This takes cleaning of course.
Now the sensitive issue.
Ordering the spare parts.
As I mentioned I used carparts, and where is the better place to order parts for English cars? Right the ebay.UK, but since they were reluctant, not cooperative to share the information about sizes I had to rely on a German seller parcoon.de, and in accordance with the "deutsche grundlichkeit" they supplied all the info needed.
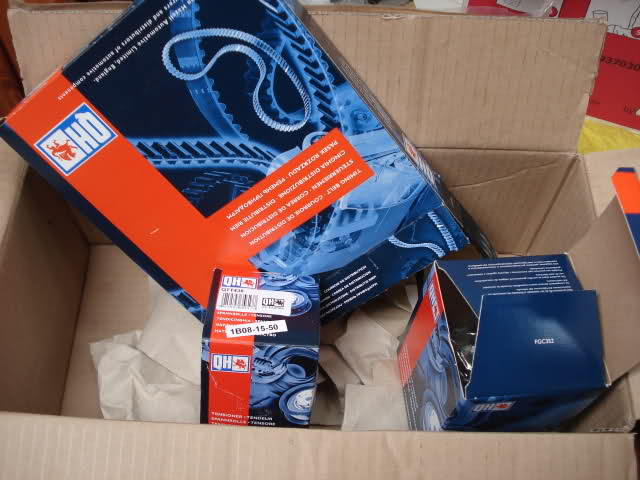
Parts list all are Google searchable
Artikeltitel: ........... CT721 the timing belt
Artikeluntertitel: ...... ROVER MONTEGO 2.0 D Turbo
Artikeltitel: ........... Spannrolle, Zahnriemen QTT438 the tensioner
Artikeluntertitel: ...... ROVER MONTEGO 2.0 D Turbo
Artikeltitel: ........... Umlenk-/F hrungsrolle, Zahnriemen QTT433 the idler
Artikeluntertitel: ...... ROVER MONTEGO 2.0 D Turbo
What did it cost I managed to buy the whole lot - shipping included - for 129 Euro. (2011)
Please check marinepartseurope.com for their week offer (sarcasm).
Edit: If parts are available at parcoon.de try www.yakarouler.fr
Without shipment the same parts are on the discount of ...................389 Euro
That make you vomit doesn't it.
Let cheer up again and start tensioning the belt.
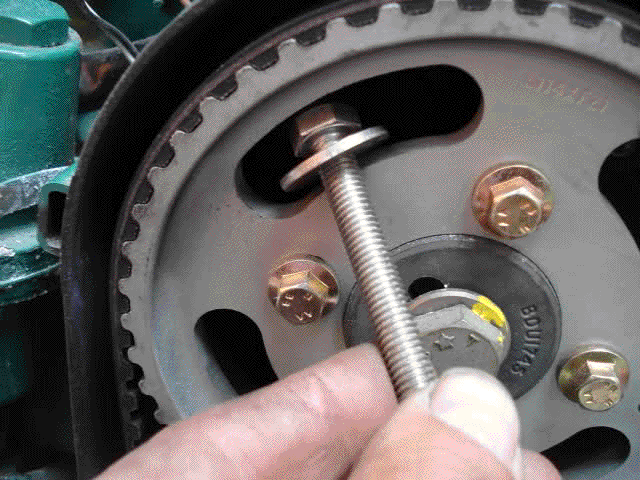
This requires a bit of trick, to displace the tensioning as far as possible we need to release camshaft gear wheel. That involves releasing the 4 bolts so the wheel can slightly give away when we tension the belt.
Do not release the 4 bolts relying on the dowel pin (in my case the drill) inserted in the cam. If it breaks you'll be crying your eyes out. Again VP supplies a special tool to hold the wheel while turning the bolts. I'm sure you filled in the story yourself, that tool also wears the marine golden label.
A simple way of dealing with this issue is just using 2 extra bolts, I guess the pics explain everything.
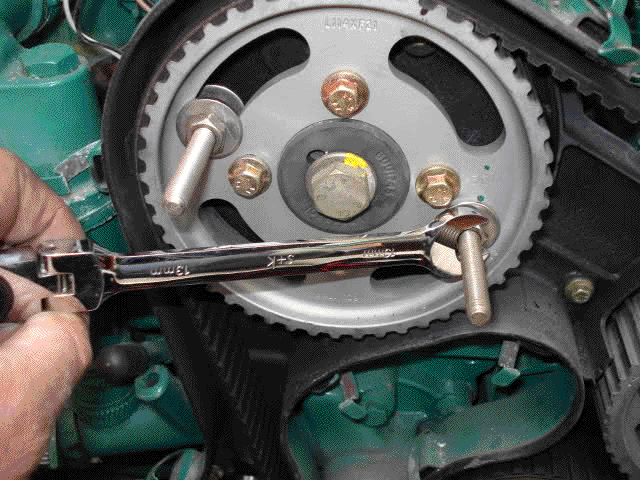
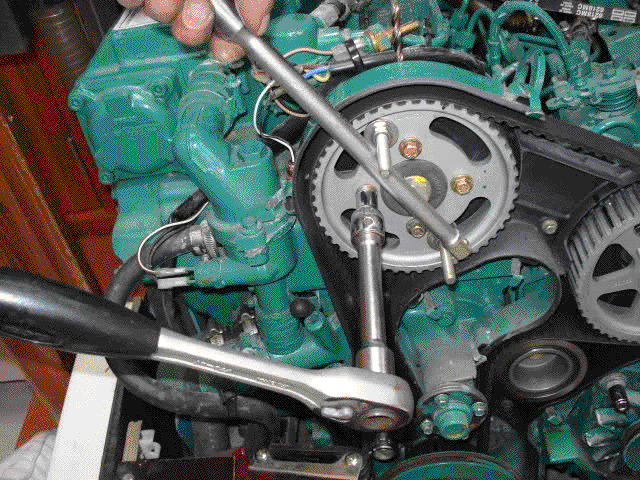
Let's bring the belt to the proper tension now.
A view on the inside gives you an idea how the setting works.
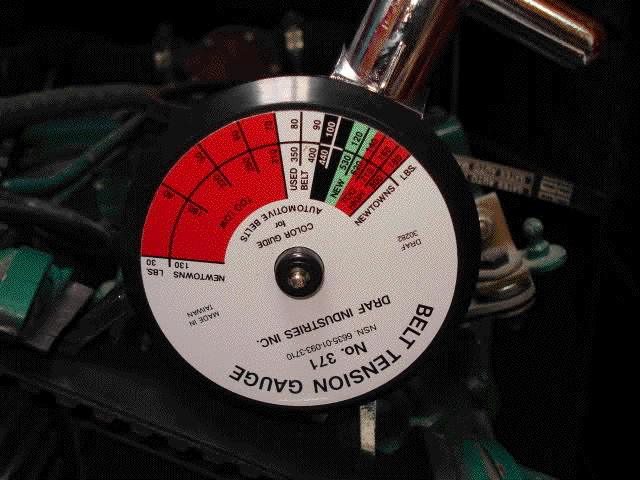
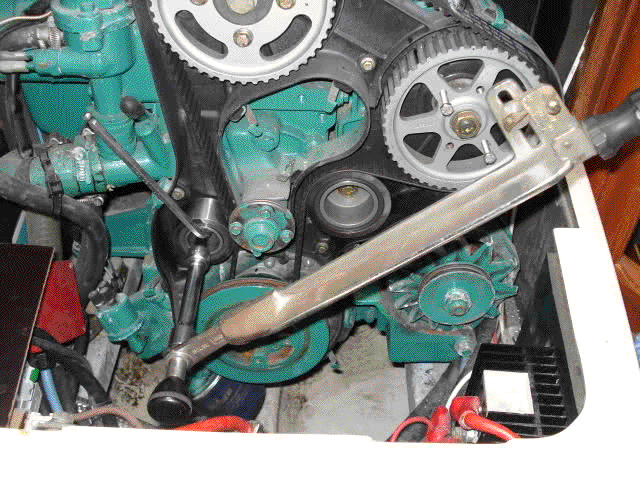
This is where a tension gauge comes in handy, I would suggest not doing it without this tool, you will be needing it after a some time in the future to check up.
I hope this contribution will help some of you, lets face it workshop and professional prices are really getting out of hand.
Sailbleu - Sun Odyssey 40DS
Editor's note: Republished from an original article from Jeanneau Owners Forum